Living the cottage life, Alaskan style!
Showing posts with label food. Show all posts

Saturday, March 23, 2013

What's in it?

As I've gotten older, and more wiser.... I tend to take better care of what I put in my body.  Okay, it doesn't hurt that some of it is because of doctor's orders.... like flaxseed for extreme dry eyes or vitamin D because of sun deprivation here in Alaska or less sugar because of high glucose levels.  Maybe that's what started it.  But I am more conscience now of what I eat, how it's grown, where it's grown, and how it's prepared.

But my latest journey for a better life is to check ingredients.  I try to buy organic but it's quite expensive where I live and we don't have the luxury of farmer's markets.  I do grow vegies in the summer but because of our weather, we're restricted to cold weather crops--lettuces, kale, spinach, chard, peas, etc. Growing our own salad ingredients is a great way to know what's going into our body, and knowing that it's pesticide free.  But because gardening can be very challenging here, every year I say "this is the last year for gardening," but then spring rolls around and next thing you know, I've got lettuce, chard, and peas planted!   

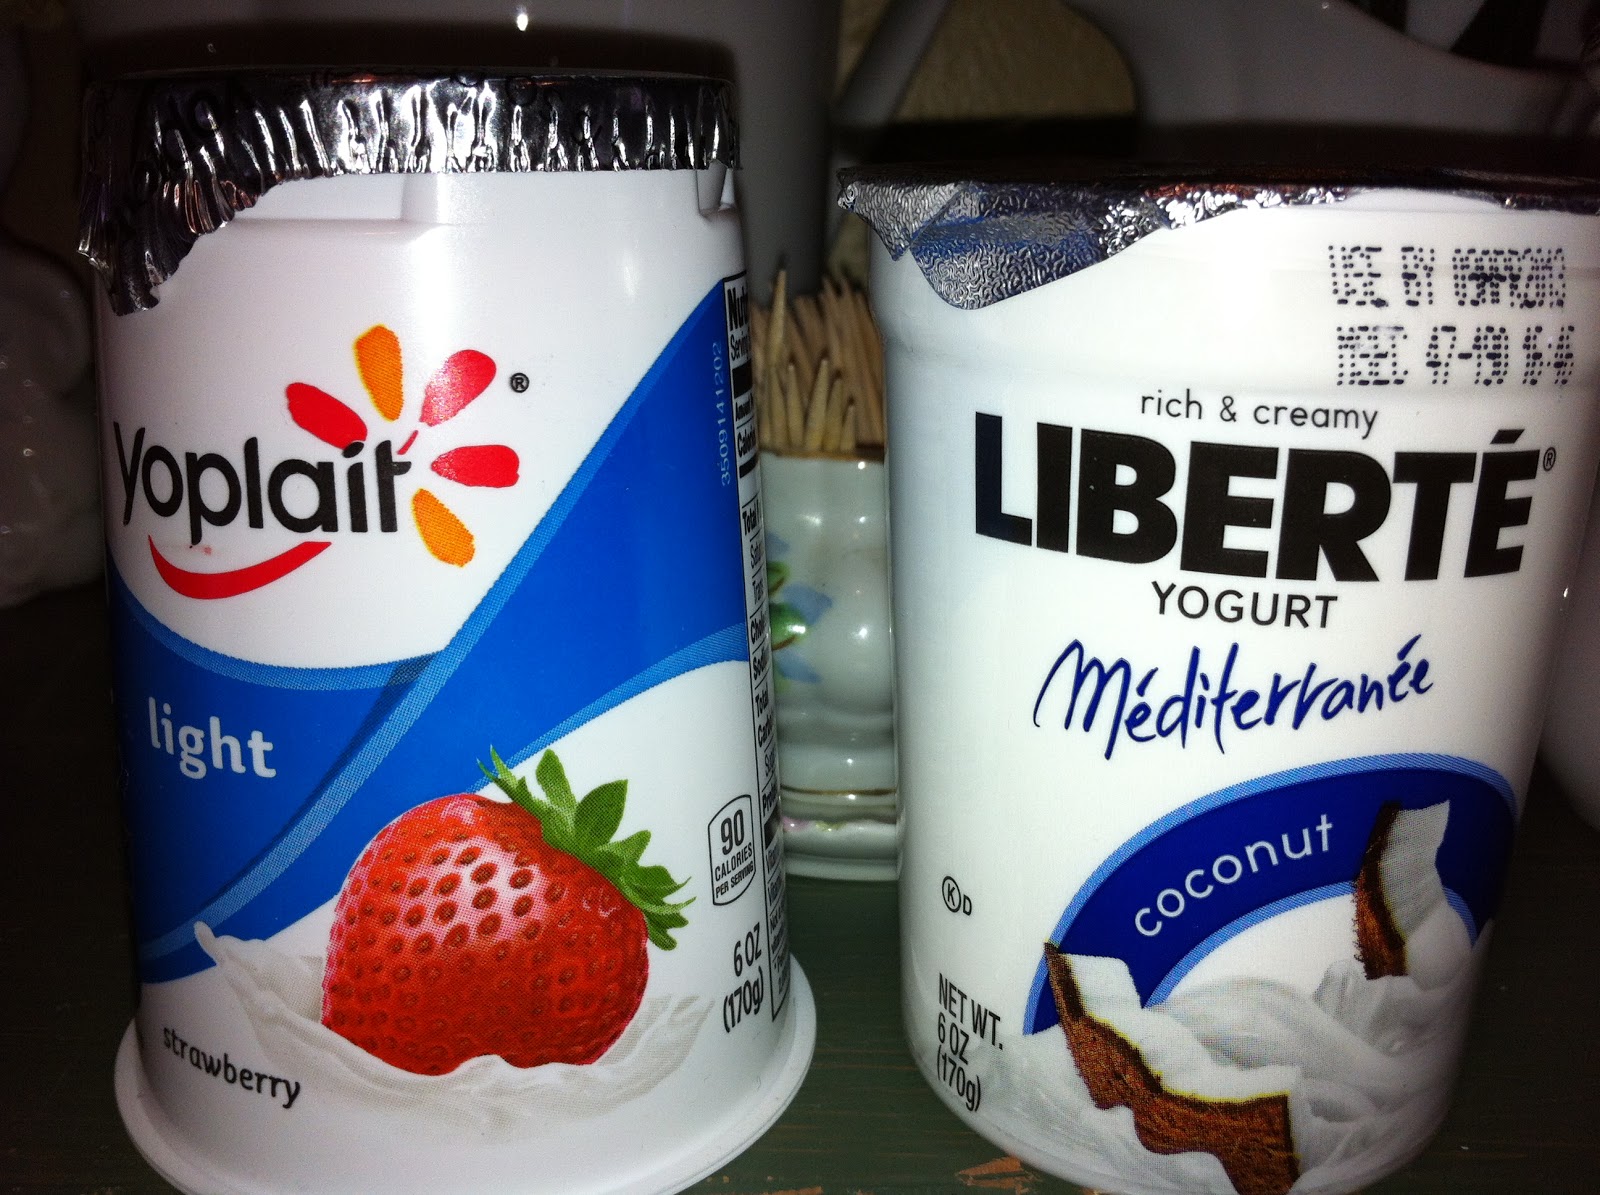
Anyway, growing my own leafy vegies is one way I can keep track of what we put in our mouths.  The other is to check the ingredient list which hasn't become an automatic thing for me yet.  I just assume.... because we are mindful of what we eat and why I choose the products I do.... that it's good for us.  But yesterday, as I was putting my Yoplait No Fat yogurt into my grocery cart, a new yogurt caught my eye.  Liberte. 

I thought what an odd name for a yogurt.... But the coconut flavor ingrigued me so I picked it up and by some miracle, I turned the container around to look at the list of ingredients.  Now, note, I have NEVER done this to Yoplait yogurt.  Like I said, I just assume that what I choose to buy at the grocery store is bought because it's best for my body.  In this case, it was because of the "no fat" content. So now I pick up the Yoplait and turn it around to look at the nutritional value and list of ingredients.  This is what I found:
Look at the list of ingredients in Yoplait, most of which I have no idea what they are!  This simply is not acceptable any longer.  The list for Liberte is simple:  whole milk and cream, sugar, coconut and a handful of other somewhat familiar ingredients.  The question is.... will I trade the "no fat" content for 13 grams of fat now....?  Maybe once in a while it won't hurt me...?  Will I trade the higher carb content? Possibly.  Liberte yogurt is THE BEST yogurt I have ever eaten in my life. It is so smooth, and creamy, and yummy it just caresses my mouth with the better things in life. Yes, once in awhile won't hurt me....  After all the list of ingredients IS better....

Later! 
Nancy

Friday, August 12, 2011

bark

I posted this story last year but because it's a dark and dreary morning and because it's my day off and I'm in no hurry to do much of anything, I thought I would repost a story from last year.  It's not a story so much as a delicious recipe.  I'd like to say it was healthy for you, but.... probably not so much.  It does have nuts and grains and dried fruits, but that white chocolate...  yea probably not so good for you


I hope you try it because it really is a delicious treat.  Use it for dessert or for any time.  I freeze it and take out a  little at a time.  It also makes a great Christmas gift.  You can adjust the dried fruit to what suits you--cranberries, raisins, apricots.  Same with the nuts and seeds that you add.  Click here for the recipe for Bark.  Again, this came from my former blog, Pieces of the Puzzle. 


I hope you try it.  It really is soooo good! 

Later!  Nancy

Wednesday, August 3, 2011

Rhubarb Salsa

My heritage comes from farm folks.  It's in my genes.  My grandparents lived through the depression and raised their own food.  They lived a life of necessity.  A good life.  My own mom canned all our food.  What we didn't grow in our garden, we self-picked or I suppose it was given to us.  I don't really remember.  All I remember are the canning days when mom would process pears and can them and tomatoes and grape juice and green beans and corn and relish and pickles and more pickles and hot peppers.  Anything you can imagine, my mom canned or froze. 

Me?  Not so much.  I never got the genes that give me the desire to can.  I go to the store and buy it but I admire those who do can.  My son, bless his heart, is one of those people.  He's only 27 but has been canning for years--pickles, fish, clams, pickled beans and mushrooms.  HE got the genes!  (Maybe they skip a generation....) 

And my husband loves to can as well, so maybe it's turned into a male thing!  He mostly cans fish but branched out to rhubarb salsa this weekend.  And it was good! 

"We" canned 29 jars of salsa and already ate three.  One batch turned out a little runnier but we drank it down like wine! 

If you have an abundance of rhubarb, this is a great way to use some of it. 

My rhubarb has expired for the year, but if you want to be put on a list to have rhubarb shipped to you next season, let me know! 

Rhubarb Salsa

3 cups chopped tomatoes
2 cups chopped rhubarb
1 cup chopped tomatillos
1 cup chopped yellow onion
1/2 cup chopped chile peppers (a combo of habernero, yellow, spicy, anaheim)
1 tbs garlic paste
1/2 cup brown sugar
2 tbs cilantro
2 tbs ground cumin
1/2 tsp salt
1/2 cup white vinegar
1/2 cup lime (fresh) juice

Wash and sterilize your jars.
Combine all ingredients in a large sauce pot. 
Bring mixture to a boil
Reduce heat and simmer 10 minutes.
Ladle hot sauce into hot jars, leaving 1/4 inch head space.
Adjust two piece caps.
Process 15 minutes in a boiling water bath canner.

(My husband used two anaheim and two habernero and it was a mild sauce.)

Enjoy!  Nancy

Monday, August 1, 2011

Rhubarb Nut Bread

One thing I can grow here in Juneau is beautiful rhubarb.  This is no ordinary rhubarb, it came from Pack Creek, a Brown Bear reserve on Admiralty Island, in Southeast Alaska.  Stan Price lived there and he was my first husband's great uncle and one of those rare people that you feel fortunate to have known. 

Stan built his own sailboat and traveled the waters where he settled in Alaska with his wife.  They lived remotely where the only access was by float plane or a small boat.  They grew their own food in the sandy beaches supplemented with seaweed and cut their own firewood from the Tongass National Forest.  Their home was a small cabin built on large tree trunks that floated with the incoming and outgoing tide.  When the tide was high, you floated; when it was low, you settled on the mud flats.  Stan befriended the big grizzly bear, raised a few bear cubs, and had collars on his "pet" deer which he fed in the winter so they wouldn't die.  In the winter time, the bay would freeze and you were stuck there until spring thaw. 

I confiscated a start of his rhubarb in the 70's and every time I move to a new home, I dig up this rhubarb and take it with me!  I now have eight plants that are almost ornamental they're so beautiful.  The stalks, alone, can be 4' tall and the leaves can get as large as a couch cushion.  

I have a few friends who love rhubarb and are more than willing to take some off my hand.  This year I harvested enough rhubarb to make rhubarb cakes, bread, and salsa.  I still have eight quarts in the freezer for winter use, which isn't much, but it's enough. 

I found this recipe for rhubarb nut bread from the blog the alchemist.  If you love rhubarb, you should try this recipe.  Even if you don't; it's that good.  My husband is not a sweet eater and he was gobbling one bite after another.

I'm always on the lookout for new rhubarb recipes and was pleasantly surprised with this bread.  It has some unusual ingredients in it....like sour cream!   


It also has a yummy topping on it that makes the bread so good. 


My first batch of bread (8 mini loaves) turned out like this.  It was clear I had overfilled my containers and all this yummy goodness seeped over the side of my mini aluminum pan.  And on my oven floor.  And it burned.  It was a horrible horrible mess and required the oven to be cleaned.
As I tried to carefully remove the bread from the tin, all the topping that was oozing over the side would break off.  Okay....  I just had to eat it!  But look at how moist and yummy it looks on the inside.  It was more like a crumb loaf the way it broke apart.  We couldn't keep our hands off it. 
I made a second batch (of 10 loaves) and didn't fill the pan nearly as full this time.  Darn if it still didn't rise and seep over the side and onto my oven floor.  Oh, well.  The bread is still good and worth the mess.  I hope you try it. 

Here's the recipe for Rhubarb Nut Bread

Ingredients for Bread
1-1/2 cups  brown sugar, packed
1 cup vegetable oil
2 eggs
1 cup sour cream or plain yogurt
1 tbs vanilla
2-1/2 cup flour
1 tsp salt
2 tsp baking soda
2-1/2 cups diced rhubarb
1/2 cup chopped walnuts

Topping
1/2 cup brown sugar
3 tbs flour
1/2 cup walnuts, chopped
3 tbs soft butter

Preheat oven to 350 degrees.  Grease 2 8x4 loaf pans or 4-5 mini loaves.

In a large bowl, blend together the brown sugar, oil, and eggs.  Add the sour cream/yogurt and the vanilla.  Mix well again.  Add the flour, baking soda, and salt and blend until all incorporated.  Add the rhubarb and nuts and mix well.

Pour batter into greased pans.

Make the topping.  In a medium bow, blend the soft butter, brown sugar and chopped nuts until crumbs form.  Divide the mixture between the loaves and sprinkle over the batter. 

Bake for 50 minutes or until a toothpick inserted into the center comes out clean. 

Enjoy!  Nancy
Posted by Picasa

Friday, July 29, 2011

Seafood Chowder

We've been having a lot of rain this week, real Fall weather.  So it seemed  like a good time to make a batch of seafood chowder.  If you know me, a "batch" isn't a small pot, perfect for the two of us for a meal.  It means a large stock pot, maybe even overflow, perfect for sayyyyyy 10-12 people!  I never learned to cook small, even after the kids left, so if you're ever in the area, don't be shy about stopping over for dinner!

I'm not one of those food bloggers that take beautiful step-by-step pictures as they're making their food item. I wish I was, but the lighting in my kitchen is not good and there's always shadows on the item.  The other reason I don't make a good food blogger is because I forget to take pictures along the way.

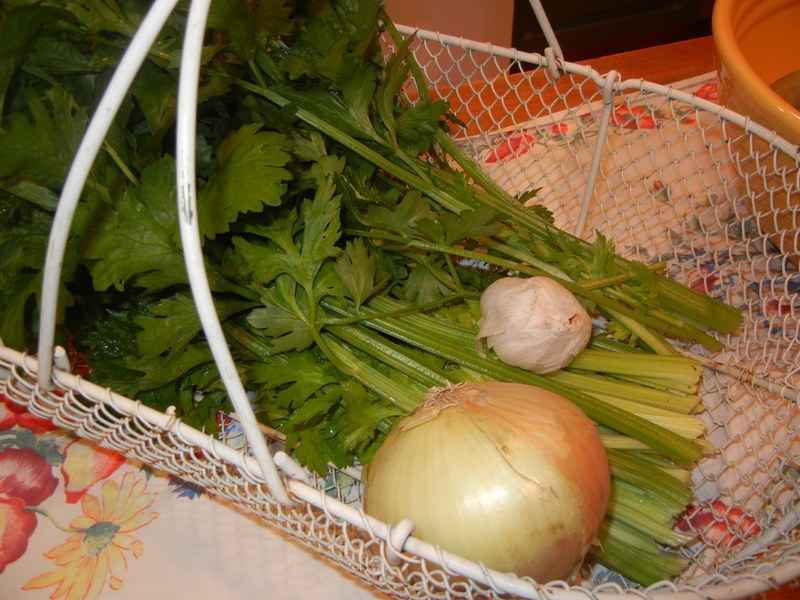
I started out with this picture of celery picked from my garden.  I love it!  

Then I skipped a couple steps and now you see the bacon frying. 

What you don't see is the celery, onion, and garlic sauteing.  Next I've added flour for thickening, water, and chicken bouillon to season, and cook until thick. 

Here the potatoes are diced (in large chunks), ready to add to the mixture. 

Oh, where does the "seafood" come in?  I added some halibut to it after the potatoes were done and let it cook another 15 minutes.  The very last step was adding some milk. 

Imagine.... 30 minutes later and you've ladled this wonderful chowder into your bowl.  Add a dollop of butter, some salt and pepper, and you've got one of the best meals ever. 

This chowder is so versatile.  Depending on the mood, I'll add salmon some times.  Other times I'll add it all--halibut, crab, shrimp and scallops.  But it's a great potato chowder all on its own. 

Here's the recipe: 

That's the recipe I use as a reference and if you wanted to make a smaller serving.   To serve 10-12, go by this list:  
1 pound of bacon
1 whole onion
8 cloves garlic
handful of celery stalks
1 cup plus flour
12 cups water
8-12 chicken bouillon
5 pounds potatoes
whatever fish or seafood I have
2-3 cup whole milk

Enjoy!  Nancy
Posted by Picasa

Wednesday, July 13, 2011

hot dog roast

The other night we feasted on fresh King Salmon!  There's a new seafood market in town and we were able to buy whole salmon for $8.50 a pound!  We bought three whole salmon. 
Mike grills THE BEST salmon.  Here's his secret ingredient--Hickory Smoked Salt.  Yes, you heard it here, first. 
Sprinkle a generous amount on both sides of the steaks.  These steaks are "butterflied." 
Then you grill on a hot bed of coals for literally a couple minutes, just until the salmon is no longer raw.  You want to get it off the grill while the oils are still oozing out.  That's what makes it so good.
The salmon flakes away just so....  and it's so good you'll think you died and went to Heaven. 
Yes, it's THAT good.

Anyhow, that was two night's ago. 
Last night we had Ball Park All Beef Dogs roasted on an open fire in the back yard!
I'm not too keen on hot dogs, but it hardly gets any better than this!
 
It started like this, with the coals just perfectly right. 

Mike made this new fire pit this year and it's so much nicer to sit around.
Our other one was just a pit of rocks and blocks and used more to burn yard debris than to enjoy.
Mike's first dog ended like this....
Yea.... he overcooked his dog.... or maybe it was the stick....
No matter, the dog ended up in the coals.
 It looks pretty disgusting here.... 
 Smores anyone? 
It was a good night.
Posted by Picasa

Tuesday, July 12, 2011

the making of a fruit pizza

Every week I try to find a new craft or home ec project to keep the grandkids busy.  Keep in mind the two oldest are 3 and 3.5 years so their attention span and degree of difficulty is limited. 

But today we made fruit pizzas.  And they were yummy!

First you roll out the sugar cookie dough.  I bought it already premade....
Then cook the dough. 

Once the crust has cooled, you spread on a cream cheese mixture:

Let the kids start attaching berries of their choice to the pizza: 

 Being sure to make sure the berry/fruit has contact with the cream cheese mixture to keep it in place:

Voila!  It was good! 

So here's the recipe:

Fruit Pizza
Sugar cookie dough, whether home made or store bought.
A variety of berries and fruit. 
We used raspberries, strawberries (sliced), blueberries, kiwi, and banana.
Cream Cheese 8 oz
1/2 cup sugar
1 tsp vanilla

Roll out your dough on a board dusted good with powdered sugar.  Otherwise it will stick. 
Keep the thickness to about 1/2"
Cook at 350 degrees for 10-12 minutes, or until brown.
Let crust cool.

Meanwhile, prepare the cream cheese mixture (cream cheese, sugar, and vanilla). 
Blend well.
Once crust is cool, spread a nice layer over the crust.

Add your berries and fruit in any manner you wish. 
Be sure fruit is connected with the cream cheese mixture as it will keep the berry in place.

If using bananas, you might spread a fruit glaze to prevent them from browning, otherwise it's probably not necessary. 

Cut in squares or pie shapes or however you want. 
Just enjoy!